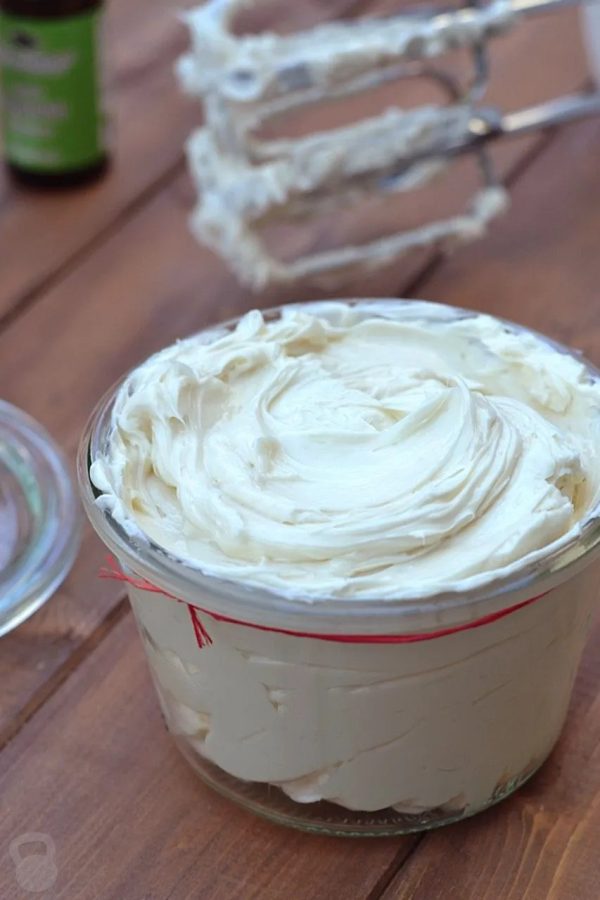
If you have ever bought a tub of natural body butter from a boutique shop, you know the price can be shocking. Fifteen dollars for four ounces is common, and those little jars disappear fast when you use them after every workout. That is why I started making my own whipped magnesium body butter at home. Not only does it save a ton of money, but it also gives me complete control over the ingredients. You get a thick, airy cream that melts right into sore muscles, plus the calming scent of lavender and peppermint. This easy DIY recipe uses affordable pantry staples and essential oils you probably already own. No expensive mixer, no hard-to-find butters. Just real results for a fraction of the store price.
Why Magnesium Matters for Muscle Pain (And Why a Butter Base Works Better Than Oil)
Magnesium is a mineral that plays a huge role in muscle relaxation and nerve function. When you are low on magnesium, cramps, tightness, and post-workout soreness hit harder. Applying it topically lets your skin absorb the mineral directly into the problem area, bypassing the digestive system entirely. That means faster relief for tired shoulders, achy legs, or a stiff lower back.
Many people buy magnesium oil sprays, but those can feel sticky, tingly, or even irritating on sensitive skin. A whipped body butter solves that. The combination of shea butter and coconut oil creates a smooth barrier that helps the magnesium absorb gradually without the prickly sensation. Plus, the butters themselves are deeply moisturizing, so your skin feels soft and nourished, not greasy or tight. You get pain relief and skincare in one jar.
For a budget-friendly approach, skip the fancy raw African butters and look for regular unrefined shea butter at a grocery co-op or online bulk store. A pound of shea butter costs about the same as one small store-bought magnesium balm, and it will yield four or five batches of this recipe.
Essential Oils That Actually Help Sore Muscles (Lavender, Peppermint, and a Few Surprises)
Essential oils are the secret weapon in this essential oil blend for muscle pain relief. Lavender is the classic choice because it reduces inflammation and promotes calm. Peppermint adds a cooling sensation that distracts your brain from deep aches. But you do not need a dozen fancy oils. A simple three-oil combo works perfectly.
- Peppermint essential oil – cooling, analgesic, and great for immediate relief. Use 15 to 20 drops per batch.
- Lavender essential oil – soothing, anti-inflammatory, and helps you sleep better after a tough day. Use 15 to 20 drops.
- Frankincense or copaiba essential oil – both support deeper tissue recovery. Use 6 to 8 drops if you have them. If not, double the lavender instead.
One real talk note: cheap essential oils from discount stores often contain synthetic fillers that do not help pain. Look for a budget brand like Plant Therapy or Aura Cacia that offers pure oils for under ten dollars a bottle. You will get dozens of batches from a single 10 ml bottle, so the upfront cost is worth it.
You can also swap peppermint for eucalyptus if you prefer a warmer, woodsy scent that still opens up tight muscles. Just be careful with eucalyptus around young children or pets – peppermint and lavender are generally safer choices for a family home.
The Only 4 Ingredients You Need (And Where to Find Them on a Budget)
This DIY beauty recipe is intentionally short. Four ingredients, no complicated steps. Here is what you need and how to save money on each one.
1. Shea butter (½ cup) – the base that gives the butter its fluffy texture. Unrefined shea butter is best because it retains more vitamins. Buy a one-pound block for about $8 online and store it in the fridge. Avoid tiny jars sold for $10 for 2 ounces. Bulk is always cheaper.
2. Coconut oil (¼ cup) – adds slip and helps the magnesium spread evenly. Virgin coconut oil works fine, and a big jar costs around $7 at any grocery store. Refined coconut oil has no scent, which is nice if you want the essential oils to shine.
3. Magnesium flakes (2 tablespoons) – do not use Epsom salts (magnesium sulfate). You want magnesium chloride flakes, which absorb better through the skin. A 2-pound bag is about $12 on Amazon or at a natural food store and will last for many batches. Some people use magnesium oil directly, but flakes dissolve easily in a tiny bit of water before whipping.
4. Essential oils (your chosen blend) – as discussed above. Total cost per batch for the oils is less than $0.50 if you buy smart.
Optional but nice: a few drops of vitamin E oil as a natural preservative. It costs pennies per batch and helps the butter stay fresh for months.
Step by Step: How to Whip Magnesium Body Butter Without Any Special Equipment
You do not need a stand mixer or a hand blender to get that light, airy texture. A simple bowl and a fork or a small whisk work fine. Here is the method I use every time, and it never fails.
First, melt the shea butter and coconut oil together in a double boiler. If you do not have one, place a heatproof bowl over a saucepan with an inch of simmering water. Stir gently until completely liquid. Remove from heat and let it cool to room temperature. You want it to be liquid but not hot. If you add the magnesium and oils while it is still warm, the texture will be grainy later.
While the butter mixture cools, dissolve the magnesium flakes in 1 tablespoon of warm water. Stir until clear. This little slurry is key. If you add dry flakes directly, they will not blend into the fat and you will end up with gritty butter that does not absorb well.
Once the shea and coconut mixture is cool and starting to look opaque around the edges, pour in the magnesium slurry and your essential oils. Use a fork or a small whisk to stir vigorously. Then place the bowl in the fridge for 20 to 30 minutes. You want the mixture to become solid but still soft, like the texture of chilled butter.
Now comes the whipping. Take the bowl out and beat the mixture with a fork for a minute or two. It will turn from a solid block into a fluffy, whipped cream. Do not overbeat or it will get grainy. Stop as soon as it looks like stiff frosting. Spoon it into a clean glass jar and let it set at room temperature for an hour.
That is it. You now have a full jar of whipped magnesium body butter that rivals anything from a high-end boutique, at less than $3 per batch.
How to Use This Butter for Maximum Muscle Pain Relief (Tips From a Regular User)
Slathering it on randomly is fine, but a few simple techniques make the relief last longer. First, take a warm shower or bath before applying. Warmth opens pores and helps the magnesium absorb deeper. Pat yourself dry and then massage a generous amount into the sore spots. Focus on the belly of the muscle, not just the bones.
For upper back and shoulder tension, scoop a quarter-size amount and have a helper rub it into the trapezius area. The scent of lavender and peppermint will linger for a couple of hours, which is perfect for winding down after a long day or a hard workout.
A common mistake is using too little. Magnesium butter is not as concentrated as magnesium oil, so you need a decent amount to feel the effect. Apply as much as your skin can absorb without leaving a greasy film. Usually a dime-size area for a small patch, more for larger muscles like quads or hamstrings.
Store the jar in a cool, dark place. If your house is warm and the butter melts, just pop it in the fridge for a few minutes and re-whip it. It will fluff right back up. With proper storage, this batch stays fresh for three to four months.
Frugal Swaps and Variations (How to Customize Without Spending Extra)
Not everyone tolerates coconut oil well. If you are sensitive to it or just dislike the smell, swap it for cocoa butter or mango butter. Cocoa butter is harder, so you will need to melt it fully and whip it a bit longer. Mango butter is softer and whips easily, but it costs a little more. For the cheapest option, stick with shea and coconut.
If you want a fragrance-free version for people with scent allergies, skip the essential oils entirely. The butter will still work for pain relief because the magnesium does the heavy lifting. The oils just add a bonus aromatherapy effect. You can also add a pinch of dried lavender buds for visual appeal, but they do not contribute to pain relief.
Another budget hack: buy magnesium flakes in bulk and store them in a sealed bag. Do not be tempted by fancy packaging. The same chemical compound inside a plain bag works exactly like the one in a pretty box. Save those dollars for a good peppermint oil.
For an extra cooling sensation on hot days, store your jar of body butter in the refrigerator. The coldness combined with the peppermint creates a dual cooling effect that soothes inflammation and takes the edge off fresh injuries. Just let it soften for a minute at room temperature before scooping, or it will be too hard to spread.
Realistic Shelf Life and Safety Notes (What No One Tells You)
Because this butter contains water from the magnesium slurry, it can go bad faster than an anhydrous balm. Always use a clean, dry spoon to scoop out what you need. Never dip wet fingers into the jar. If you see any mold or an off smell, toss the batch immediately. Usually it will stay good for three months at room temperature, or up to six months in the fridge.
Essential oils can be strong. Do a patch test on your inner arm before slathering all over. Some people find peppermint too intense if they apply right after a hot shower. If that happens, mix a little extra coconut oil into the butter to dilute the scent.
Pregnant or nursing women should check with a doctor before using peppermint or eucalyptus oil in high amounts. Lavender is generally considered safe, but it is always better to ask. And keep the butter out of reach of small children, not because it is toxic, but because it looks like frosting and they might try to eat it. The taste is not pleasant, but it is better to be safe.
One last budget tip: if you make a big batch and realize you do not love the scent, just remelt the butter over low heat, add a different oil blend, and re-whip. Nothing goes to waste. That is the beauty of homemade DIY beauty projects – you are the boss of the recipe.
I have been making this whipped magnesium body butter for over a year now, and it has replaced all my store-bought muscle rubs. My gym bag always has a small tin. My mom uses it for her arthritic hands. And the best part is that I never feel guilty using a generous scoop because each jar costs less than a fancy latte. Give it a try, and see how good it feels to take control of your self-care without breaking the bank.
If you whip up a batch, I would love to know which essential oil combo became your favorite. Leave a comment or tag me in your jar photos. Happy whipping and sore muscle relief.
#WhippedBodyButter #MagnesiumBodyButter #MusclePainRelief #EssentialOilBlend #DIYBeauty
Leave a Comment