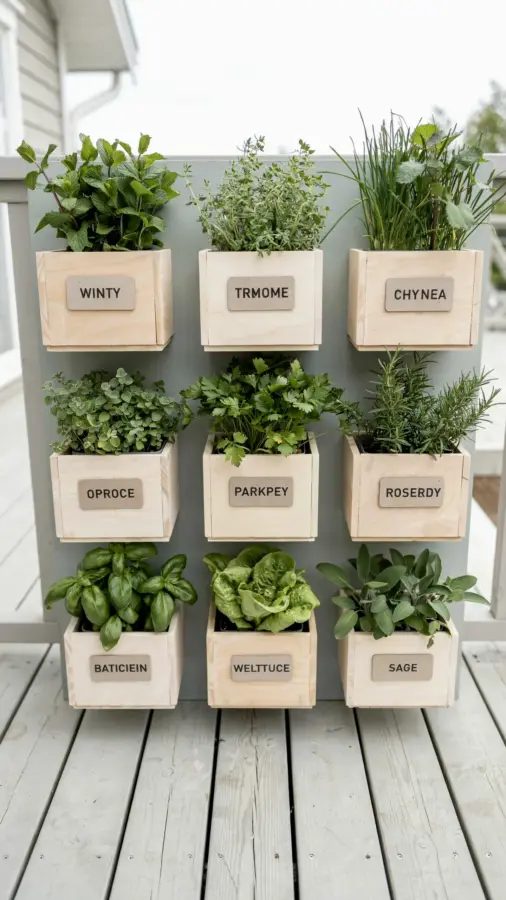
You bought the crate three weeks ago. You’ve got the potting soil, the plants, and a vision of a cozy little deck corner that looks like it belongs on a magazine cover. Now you’re staring at a wooden box on your porch and wondering why it looks like something you’d store firewood in.
That’s the problem with plant crates on a deck oasis. They sound foolproof. They aren’t. You’ve seen the Pinterest photos where stacked wooden boxes look effortless and overflowing with greenery. You can make that happen. It just takes avoiding some very common mistakes that turn a rustic dream into a splintery, waterlogged disaster.
Here’s the good news: every single mistake is fixable. Most of them are preventable before you even fill the first box with dirt. Let’s get to work.
Mistake #1: Using Raw Wood That’s Destined to Rot
Look, that beautiful crate from the craft store is not made for the outdoors. It’s made for a shelf. That’s fine if you’re only decorating for a weekend, but for a summer-long rustic deck garden, you need to address the wood first.
The moment you put wet soil against untreated wood, you’re setting a timer. It’s not a question of *if* it’ll rot. It’s a question of when. Here’s the fix: line the inside with a heavy-duty trash bag or landscape fabric, and I mean line it completely. Then, poke a couple of small drainage holes in both the liner and the bottom of the crate.
Honestly, the single easiest move is to put your plants in a cheap plastic nursery pot first. Use the crate as a pretty decorative sleeve. That way, the wood stays dry and you can swap out plants when one gives up on life. You’ll thank me in August.
Mistake #2: Skipping Drainage for the Sake of the Porch
I get why you want to skip the drainage. You’re worried about dirty water staining your deck. Right? But if you seal the bottom completely, you’re drowning the roots. That’s the fastest way to kill everything.
The workaround is simple: use an old cookie sheet or a planter tray underneath the crate. Or, build the crate up with a few small pieces of wood, basically little legs, so water can escape without leaving rings all over your floor.
Another option is to put an inch of gravel at the bottom of the crate before adding soil. It’s not perfect, roots can still sit in water, but it helps keep the soil from getting soggy. I’ve also used a baking rack from the thrift store to keep the liner off the bottom. A bit odd, but it works like a charm. Decorative practicality. That’s the game.
Mistake #3: Ignoring the Sunlight Hitting the Box
Not all decks are created equal. The crate in the shade by the door is a totally different environment than the crate sitting in the full blazing sun for eight hours.
If your deck is a sun trap, you need plants that can actually take the heat. Herbs like rosemary and thyme love it. Or, add a few tall plants like ornamental grasses or hibiscus to provide shade for the smaller stuff below. Match the plant to the spot, don’t buy tiny houseplants and wonder why they scorch.
And here’s a weird little aside: the wood color matters. A dark stained crate in the sun will bake the soil, turning it into hot, dry dust. That slower approach kills more plants than you’d think. In full sun, stick with lighter, natural wood, or keep your dark crates in a corner that gets afternoon shade.
Mistake #4: Flat-Stacking the Boxes Like a Pure Boring Shelving Unit
If you stack two identical wooden crates perfectly on top of each other, it looks like a storage unit. Not charming. Not rustic. Just a tower of boxes. You want that intent, deliberate farmhouse chaos instead.
That’s how you create a rustic deck garden that actually has character. Offset the top crate at a slight angle, or rotate it sideways. This isn’t about being neat, it’s about creating visual interest.
Try this: put one crate flat on the ground. Prop another one up on its side against the first one, and fill it with trailing ivy or petunias. Use a third crate to hold a lantern. The goal is to make it look like you casually threw some old boxes together and got lucky. The deliberate imperfection is the whole vibe for a small spaces deck garden.
Mistake #5: Cramming Too Many Plants, and Thinking About the Soil Too Late
This gets so rushed. You buy a dozen plants at the nursery, you jam them all into the crate at the same height, and it instantly looks flat and cluttered. It’s the number one reason people post their review to Pinterest, saying “it didn’t work.” No, you just didn’t think about the *layers* of it.
Here’s the secret:
– **Thrillers:** One tall spike plant in the middle or back (spiky grass, purple fountain grass, or a tall salvia).
– **Fillers:** Fluffy, bushy plants that cover the soil (petunias, vinca, or marigolds).
– **Spillers:** Vines that hang over the edge of the crate (sweet potato vine, ivy, or lobelia). This is the part that makes it look old and established.
And for the soil, don’t use the cheap stuff from the bottom shelf. Crate plants dry out fast. Mix in a handful of compost or potting mix with moisture control, and sprinkle in some slow-release fertilizer at planting time. That simple soil mix matters more than the plant selection, honestly.
Mistake #6: Gluing the Stack Together When You Have a Small Space
Some Instagram tutorials tell you to screw or glue the crates into a permanent tower. That feels great for ten minutes until you wrap your dock line around it. Then what? You’re stuck with a giant wooden block that doesn’t fit through any door, if you ever want to move it.
Trust me on this: leave the crates separate. Stack them loosely, using a sturdy crate or a couple of bricks between levels for stability, but don’t commit. A modular setup means you can move your deck garden into the garage when a storm hits, or reconfigure it for a party.
A corner looks messy? Just slide the top crate over to become a side table for your lemonade. It keeps your small space flexible. That flexibility is the entire point of using crates instead of a permanent planter box or installing a built-in bench. You get to be lazy and clever at the same time.
Mistake #7: Forgetting the Most Important Thing for Summer: Watering
Wood crates are like big wooden baskets. They breathe, which means they lose moisture way faster than plastic pots. Your plants will need water as often as twice a day in the middle of June. Maybe even more.
Here’s the thing: if you’re not a daily waterer, you’re building yourself a stress machine. Use a self-watering bottle, tip a wine bottle upside down into the soil, or chunky mulch to slow down that. Also, dry soil can pull away from the sides of the crate, forcing water to run out the gaps before it reaches the roots.
I failed at this every summer for years. Every single summer. I’d plant, travel, come back to crispy leaves, and feel like a plant murderer. Last year, I set up a tiny drip line from the rain barrel. Look, you don’t need the fancy irrigation. Just a reliable watering can you keep right by the back door.
Mistake #8: The Wood Choice Itself
Cedar and redwood are the gold standard. They resist rot naturally and look gorgeous of course. Pine is cheap but will grey and warp within a year. Honestly, the wood choice is a mistake *if* you live somewhere rainy or humid and don’t have the cash for cedar.
But don’t stress about this one too much. A weathered grey crate looks completely cool. The rustic finish itself ages into something beautiful. It’s the warping and cracking that annoys you, and even that has a solution: just add more nails and call it “distressed.” It’s all in how you frame it when your neighbor comes over.
Conclusion: Make the Mess Anyway
Trust the process. Jumble those plant crates on your deck oasis, one crooked, one leaning, one growing herbs you’ll probably forget to use. It’s a deck garden, it’s a rusted coffee table, it’s whatever you want it to be. The best part is that you can take it apart and start over every season if you refuse to glue it together like I told you to do.
Go fill up those crates and make a dinner plate of a mess. It’s your little rustic corner. I’d love to hear what actually worked for you, so leave a comment below. And definitely pin the photo for late July when you panic about what to plant next. 🌿
Leave a Comment